

Welcome to the Stonecore. This is one of the instances that a lot of tanks hate because the fights in here depend a lot on being a good tank and having great movement and awareness skills. That and the pulls are flat out annoying. Once you get the hang of it though tanking it is not hard as long as dps and healers also know the instance, it truly is very much a team effort. The first sets of pulls will look very similar to this one:
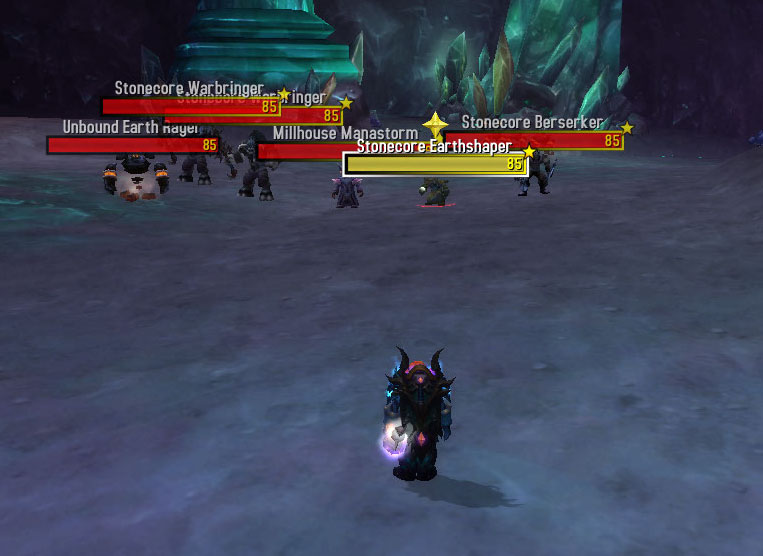
If you played in BC expansion much, you will recognize Millhouse Manastorm from the Arcatraz. He's baaaaack. This time, Millhouse is not helping you, however. The most immediate danger in this pull is the Earthshaper. If left unchecked, it will cast a spell called 'force of earth' that will cause it to transform and do a lot of damage to your group. CC it if possible and take care of it last. If CC is not possible, make sure a dps is on interrupt duty or burn him down first. Millhouse needs to be prioritized and damaged down enough that he runs away. Berserkers will charge your party randomly and the party members need to move out of the way because they do whirlwind type attacks. As the tank, you will take quite a bit of damage on each of these pulls so be ready for it. There are two more pulls just like this you will face before the first boss.
Unbound earth ragers are a nuisance but they won't hurt you, just don't let them hit on your healers. DPS can even tank them because they aren't elites. Skip the ravagers on your right by staying to the left side of the hallway.

Next pull:

The next pull is like the first one. Be sure to CC any Earthshapers or keep interrupts on them and kill Millhouse until he runs away. Warbringers will hit you hard and Berserkers will still charge your party members. The more CC you can have on any adds the better. Earthshapers and Millhouse are the only casters in the group.
Next pull.

Just like the last two. Make sure you clear any of the non-elites along the way to keep them off your healer and from pulling unexpectedly and then clear the last major pack.
Continue down the path and you will see Millhouse and one more group of adds. Tread carefully because the next boss is about to break through the wall and destroy Millhouse's party so you don't have to.

The boss is Corobus so read up on him before you engage him. He is very much a movement-based fight, as all boss fights are in this place.


These giants all have a quake spell that damages the whole party if you are on the ground when it hits. I suggest you jump at about the .5 second cast to keep from taking damage from them.

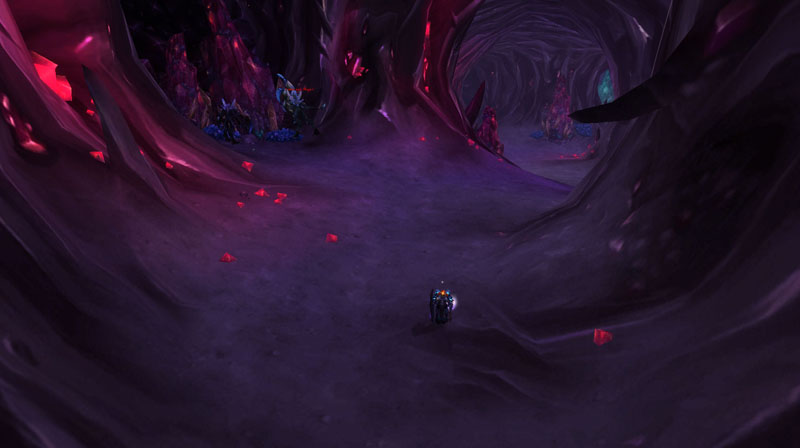
From here on out you might run into packs of rock borers that spawn and patrol around the hallway. They are non-elites but make sure you have killed any in the main vicinity before you pull your packs.

You can skip the flayers on the left by staying against the right side of the tunnel and move onto your next pull.

Pull the flayers on the right back toward you a bit so they aren't close to other mobs that patrol in the area. Flayers are easy to tank and don't hit hard except when they do their 'flay' ability. When they do this, back up from them and they will stand in place until their cast is done and then move to you once more. Do NOT face these toward healers or any cloth wearer and melee dps should stay behind them at all times.

Next pull is a giant just like the one you pulled earlier. Make sure to back him up a bit to keep him out of the way of any patrols as well.


Stop when you come to the large clearing (rocks shouldn't fall on you at the end of the tunnel so you are safe to wait for your group to catch up) and the next boss will land, Slabhide. He does not attack until you pull him, so be sure of his strats and kill him.

Once he is dead, a portal will open in his area allowing you a shorter run-back and recovery after any potential wipes you might have from this point forward.


Next pull.

In the next few pulls, you will be faced with one very easy to kill but very dangerous mobs called Sentries. When they are pulled or startled, they will alert any nearby packs of mobs. Make it your priority until the next boss to keep an eye out for these mobs and mark them. When you get the chance, have a burst damage dps kill them away from other packs.

Skip the first set of mobs on the left, there is no need to kill them and move along the right wall to your next pull.


Your next mob packs will all be similar to this one, so familiarize yourself with the mob types and how to CC/counteract them. Sentries are always the first priority. Conjurers are very dangerous to your group because they open portals through a channel that will summon multiple demon adds that will immediately want to kill your healer because of healer aggro. Make sure to keep the conjurers CCed or focus fire them after the sentries. The fire elemental mobs cast fire AoE on the ground that can be easily moved out of but you should kill them next. The two melee mobs hit hard so be ready to pop cooldowns if needed. CC as much as you can in these pulls to make it easier on everyone.
Next pull.

Once the first pack of mobs are dead, wait for the ogre to patrol near you and pull it back into the hallway. These mobs hit extremely hard and should be tanked facing away from your party to avoid the shockwave he casts.

These mobs will randomly jump around to hit other party members before coming back to you, and if party members are standing in the wrong place, they can be knocked back into non-pulled groups so make sure to try to keep your party grouped away from any other groups.

Once the ogre is down, wait for the lone patrolling add under the tent to the right. Wait for it to patrol closest to you before you pull it to prevent unintentionally pulling the next large pack of mobs.

Once you kill the patting mob, I suggest you tackle the mobs in the center of the room the same way you have handled the other pulls. Be very careful not to pull the mobs on the sides and don't forget that you can pull most of the mobs back toward you as only the conjurers are casters. Make sure if the conjurers are not CCed to have some sort of interrupt ready to pull them back with the pack and kill them first.


Once you have killed the center pack, take out the right hand side pack. Again, pull them back and control the conjurers.

You should have one pack on the right left and a patrolling ogre. Wait for the ogre to patrol left toward the middle of the room and pull him way back toward the cleared areas and kill him.

Once he is dead, you can pull and kill the final pack of mobs. Be careful with line of sight on this pull as it's easy to get the wagon or tents in between you and your healer.

Once you take out all the adds on the right side of the room, you are ready for Ozruk, the next boss. Ozruk is a really good boss to learn tanking on because this fight is nearly all about you! Learn his pattern and when to move and when to stay put and he's super easy. As you are learning he can be very frustrating. Think of it as a dance with a rhythm and certain steps and you've got it made!

Once Ozruk is dead, you'll face a mini-gauntlet. It has adds that won't re-spawn but they do wander toward you sooner or later so you will want to control how they pull by pressing forward yourself.

On the left is a pack of flayers you can skip and an ogre pats around the whole area around the edge. When he is on the right side, pull the adds in the middle. He's not important right now but keep an eye on him because you want to control when he is pulled and not have him pull accidentally on your party.

You can pull them a bit at a time to test the damage you take. They don't hit super hard unless you get a bunch of them at once.

I like to pull the entire center of the room at once and use cooldowns to get through it, but if you are just starting out and don't have the best gear, I don't suggest you do it. Notice here the ogre is starting down the left side of the room:

When the ogre is clear of the small patrolling adds and not yet to the flayers, pull him back toward where you found Ozruk (be careful not to pull him too close to the flayers).


Once he is dead, finish clearing the patrolling adds to clear the room of everything save for the flayer packs we skipped (there is one at the end of the room on the right you can skip as well).

Around the corner is the final boss of the dungeon, High Priestess Azil. The three packs of worshipers in front of her can be pulled separately and I suggest unless while you are still gearing up to definitely pull them individually. Pull them away from the alter and AoE tank each pack down and then you can fight the boss.

Once the priestess is dead, you have completed the dungeon. Grats on completing Stonecore!
No comments:
Post a Comment