
 |
Welcome to heroic Tol'vir. This instance is, in my opinion, a very good instance to start tanking heroics with. There are few pulls that cannot be CCed by most CC types to help with damage incoming and controlling packs of mobs. The most important thing in this instance is to learn which mobs are ranged so you can CC them and take care of them last rather than having to worry about line-of-sight pulling them. The instance isn't set up in a very friendly LoS pull way, so CC is pretty important as you are starting off. I will attempt to describe all the pulls so you will be able to CC the correct ones. As with any CC pulls be ready for the CC to break early, the wrong trap to be thrown, a rogue to be noticed and pull early. Tanks need to be vigilant at all times for the 'oops!' factor. This guide will not show boss strategies, there are plenty of boss guides out there, this is a guide to leading a dungeon group through the instance. Links to boss strats will be provided.

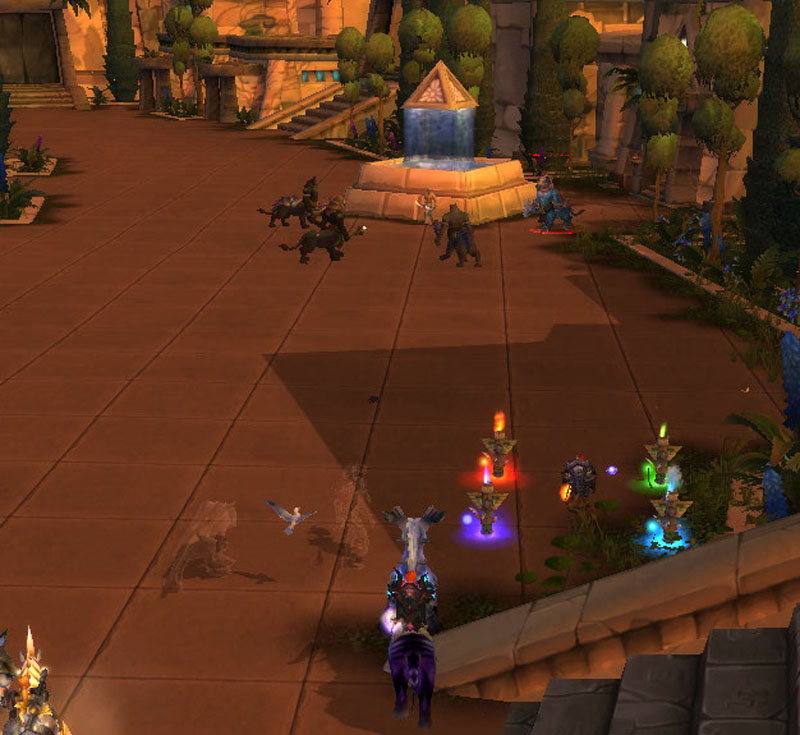
As you enter Tol'vir, you are faced with a bridge and the option to go left or right. I am going to show you the left path through the instance, so cross the bridge and face the direction we will be heading in.

This is your first mob pack. Look for the Myrmidon (marked in the back) and the Pathfinder (not marked) are the ranged here. If you are going to CC, I'd start with them and pull the other melee mobs back away from the CC. This pull, when CCed should not require any major defense cooldowns. If you AoE pull the whole group you might need to pop a minor cooldown as in my experience they aren't very strong mobs. I have found if you have a hunter in your group and want them to trap, you should let them trap pull so their trap lands every time. If you make them trap after you pull, then you might end up with a missed CC. Other ranged CCs generally have no problem waiting for after a tank pulls to put up their CC.
Occassionally on this pull, you'll get Enslaved Bandit adds from the left side of the room join into the fight. They don't hit hard and are a non-issue for the most part, just pick them up and continue right on tanking. Example:

Next Pull.

Your next pull is a patrol to the right of your first mob pack. It's a fairly simple mob to tank, it hits hard and can stun you. The main thing to remember on this mob is that he puts an earthquake on the ground that you should move out of ASAP. Depending on how hard the mob is hitting me and the quality of my healer, I might pop a small defensive cooldown on this mob. Example:

Next pull.

This mob pack is right around the corner from the last mob. This pack is has one Plaguebringer mob that should be prioritized with solid CC or, in the absence of CC, be focused fired and killed first. Try to tank it facing away from the group but do know that it can turn and randomly cast disease on your party members. The disease does quite a bit of damage if not dispelled, so this mob must be burned down quickly to minimize party damage. My personal preference is to keep this mob CCed while I take care of the other mobs in the pack and finish this one off last. The other mobs are more of the mobs you have faced before and are not very powerful by themselves. I do use a cooldown on this pull, especially if there is no proper CC in the group or somehow the Plaguebringer breaks CC.
The first boss of the instance is standing to the right of this mob pack. Do not engage the boss yet because you need to clear around his area first.

Follow the wall on the left around to your next mob pack.

Next pull.

This pull is like the last pull with the Plaguebringer being the focus of CC or first kill. The concern here is that you have a patrolling mob just beyond this group that can add if you are not careful in timing and placement. I try to CC the Plaguebringer and pull the other mobs back some to prevent the patrolling mob adding into the fight.

If the mob happens to add early, keep the Plaguebringer CCed if it is CCed and not active (it should be dead if not CCed) and focus fire on the patrol since it does the AoE ground effect and stuns that are the most dangerous. Stay calm and pop cooldowns as you can and you should be fine even if the add joins. If the add is still patrolling after your group of mobs is dead, pull it just to save yourself the headache of an accidental pull during the boss fight.
Next pull.
First boss of the instance is next. I suggest you read up on General Husam to familiarize yourself with his abilities. This is mainly a movement fight, stay out of the bad on the ground and profit!
Once the boss is down, a hallway will be accessible for you to enter and continue through the dungeon.

At the end of the hall, group up to the left and on your right is the first mob set.

Next pull. (better picture will be loaded next run)

This pull is another one of those 'oops!' pulls where people tend to face pull and accidentally run into them, as is what happened on this pull. Generally it's not too much damage coming in and the mobs are all mobs you have seen before in the instance. I tend to trap the back right one if possible (the hunter here was ready for it before the accidental pull so she got her trap off in time to save me some trouble). You might want to pop a cooldown if things are getting rough because it is a little chaotic if you don't have a controlled pull. If this pack does not get face pulled and you do control it, you should have no problems at all getting through this one.
After the pack is dead, hug the left side of the wall and continue along the walkway.
Next pull.

This is three pygmies stacked on top of each other and it's very annoying to tank. Pull them back from their starting location-they move slowly but you don't want to pull the patrolling single pygmies behind them.

The firebringer can disorient you so be ready for that. As they die, the stack gets smaller and there really isn't a lot of CC you can do unless you frog the fire pygmy with a shaman. It doesn't always hold, especially if AoE damage is going around but while it holds you will be free from disorientation and that is always nice. I occasionally will pop a cooldown on this pack.
Next pull.

Clear the remaining pygmies on the stairs. Usually when you pull one, the others will eventually join in. They are spread out enough that CC would be easy on them, but they don't hit hard enough to really need it. Burn them down and go up the stairs through the hallway to the left.

When you reach the end of the hallway, a boss is standing in front of you taunting you. Don't worry about a 'boss fight' just yet though, pull him to you and tank him for a few seconds.

Once he is dpsed a bit, he will throw a cloud of smoke on the ground to stun you so he can escape.

Next pull.

To the left you will see another pile of pygmies pull. Same as last time, the fire breathing one can disorient you. Be careful to not pull the group on the right side of the stairs and you'll be fine.

Once the pull is dead, stay on the left side of the staircase as you go down and you won't pull the other set. I like to run on the railing itself just to make sure.
At the bottom of the stairs you will face the next boss in the dungeon.
Next pull.

Read up on Lockmaw to see his strats. There are no mobs around him to pull so you have plenty of space if you need it.
Once you defeat Lockmaw, Augh (the boss who stunned you with his dust cloud before the steps) returns and you are finally able to fight him.
Next pull.

Once he has been slain, head back to the stairs and stay on the side you cleared as you make your way back to the hallway you came from.

Through the hallway and straight through till you hit the next wall (right side of the walkway now) and you will meet your next set of mobs.

I generally CC the outer two mobs on this pull of five. CCing the outside mobs allows you to tank the two middle ones and the bandit while still being out of AoE range of the CC. I would show you a better picture of this in action but on this pull our healer didn't realize what was going on and ran face first into the mobs. The hunter threw a trap and CCed the least dangerous mob in the pack. It was amusing but now I lack a decent shot of this pull. It is mobs you have faced before in this instance so you should be able to figure out which to CC or pull first to fit your own style.

Next pull.

After the mobs are dead, hug the right wall until you find a set of mobs on either side of the staircase. You can easily CC the hunter on the left side of the stairs and pull the mob closest to you. The hunter's pet will also be free to beat on your party so pick it up with the mob you are tanking. Once they are down, finish off the CCed mob and head up the stairs.

At the end of the hallway you will find a pull of four mobs slightly spread out. I highly suggest CCing the Plaguebringer, as always, and also the Theurgist on the far left. These two are the most troubling mobs. The mob on the right is a caster so a ranged silence is very useful here. Be careful to pull the mobs back toward you a bit because there is another pack of mobs to the right that can pull accidentally if you get too close. I tend to AoE pull these a lot now and use a lot of defense cooldowns, but if you keep them CC-locked, they don't hurt too much.

Follow the path to the right and stay against your right wall. Have your ranged pick off the mobs that fling poo on you. They don't do too much damage and at least for the first one you will encounter, you have a high right of pulling the extra mob pack if you get too close to them.
Next pull.

As you make your way down the walkway, you will encounter a roaming pat. It's best to CC the Plaguebringer and focus fire the other target down. Be careful with AoE here, the yellow camels are not hostile unless you hit them. If you hit them, be ready to pick them up and tank them till they are dead as well.

Continue killing the poo-flingers as you go to the end of the walkway and turn left. You will be facing the next boss but do not pull him yet.

Next pull.

Take care of the nearest add and then wait for the roaming mobs to come back to your group. The Theurgist should be CCed once more and the other burned down.
Once the adds are burned you are ready for the next boss.
Next pull.

High Prophet Barim is next. Read his strats on wowhead so you know how to tank him. Once you have killed him, a tower behind you will crumble and a tornado-vortex will appear that you and your party should jump into.

The vortex puts you on a platform for the final boss of this dungeon: Siamat.

He has a lot of movement and a point in his fight that you might get bounced off the platform, but don't despair, the game will return you to the platform if that happens. Defeat the boss to gain your clear!
 |
| LOOT THE HAT! |
No comments:
Post a Comment